Sunday, September 29, 2013

RHUBARB MARMALADE

RHUBARB MARMALADE..... I made a batch of this with the crop of rhubarb that grew this year.  The original recipe I found is made with oranges but I changed it up with limes instead.  I have not been successful in growing rhubarb for many,  many years  but since moving to the Sunshine Coast of  BC  - I can now grow rhubarb!  I was given a small plant  by my sister Wendy and originally had it planted near my deck but it did not do so well.  When I built a new garden area I transplanted this original plant (well it fell apart into 3 pieces) so I planted all three in different areas of the yard and they are all doing  very well.  I now have an abundance of rhubarb.  I am not a total fan of  marmalade ( with oranges) but this one is a keeper.  I also made another batch but substituted Limes for the Oranges and it became  Rhubarb Lime Marmalade - another good one!
 
 
Rhubarb Marmalade
 

The ingredients you will need  - substitute limes for oranges

  Oranges chopped and in the food processor.

 All processed and ready to  be added to the  pot.

 Rhubarb, oranges and sugars added.

 The  Rhubarb Marmalade is ready to be jarred.

Beautiful colour - Rhubarb Marmalade.
 
 
RHUBARB MARMALADE RECIPE
 

6 cups chopped fresh or frozen rhubarb
6 cups sugar
2 medium oranges
For Rhubarb Lime Marmalade ( use 3 limes - omit oranges)

Directions

Combine rhubarb and sugar in a Dutch oven.
Grind oranges, including the peels, in a food processor; add to rhubarb mixture.
Bring to a boil.
Reduce heat and simmer, uncovered, stirring often until marmalade sheets from a spoon
 about 1 hour.
Remove from the heat; skim off foam.
Carefully ladle hot mixture into hot half-pint jars, leaving 1/4-in. head space.
Remove air bubbles; wipe rims and adjust lids.
Process for 10 minutes in a boiling-water canner.

Yield: about 8 half-pints.
If using frozen rhubarb, measure rhubarb while still frozen, then thaw completely.
Drain in a colander, but do not press liquid out.


'I hope I can be the Autumn leaf, who looked at the sky and lived.
And when it was time to leave, gracefully it knew life was a gift.'
 — Dodinsky

Saturday, September 28, 2013

French Onion Soup

It sure does feel like fall, the rains have started, the winds are blowing and what we need is a nice pot of soup!  Soup is so warming and so very filling.  Growing up my Mother always had a pot of soup with our supper.  Vegetable, Pea Soup, Borscht, Bean Soup and many others, we started our meal with a bowl of soup  with Mom's freshly made bread, then had our main course or either vegetables or pyrohi and of course Mom always had a dessert.
I made French Onion Soup for my family yesterday.  The French Onion Soup ladled over toasted sourdough garlic bread that was sprinkled with grated Swiss cheese.  Oh so fragrant, filling and delicious and the best part - so simple.  Another family favorite on a cool, damp fall day.  Enjoy.

French Onion Soup - Pam's way


   Ooooo....so delicious.
 
The ingredients you will need.
 

 Onions are sliced and ready for the  pot.


Butter, melted and awaiting the onions.
 

   Onions sauteing in the butter. Smells heavenly.
  
 After approximately 20 minutes, the onions are caramelizing nicely.

 Add the red wine (or red wine vinegar) and then sprinkle with flour.
Cook for  1 -2 minutes.
 

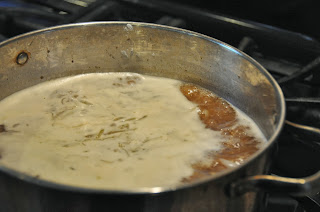
 Broth is added and brought to a boil, simmered for another 10-15 minutes.
 

Sourdough garlic bread is toasted and topped with shredded Swiss Cheese.

French Onion Soup poured over the cheese and bread, Yum
dinner is served.
 
 FRENCH ONION SOUP RECIPE
 
3 - 4 large onions, sliced into rings (1/8" thick) (can use more onions if you like)
1/8 - 1/4 cup butter
3 Tbsp. flour
6 cups vegetarian 'beef' broth -  or vegetable broth
1/3 cup dry wine white/red or red wine vinegar
vinegar
salt, pepper

Melt butter, add the sliced onions, season with salt and pepper and saute until they caramelize,
approximately 20 minutes on med-low heat.   Add the wine and then dredge with flour.
Saute 1-2 minutes and then add in the broth, bring back to a boil and then turn down
heat and simmer for another 15 minutes or so.
   Make up some garlic bread and toast.  Shred the cheese (we love Swiss but you can use a cheese of your choice).  Pour soup over top and enjoy!

'Memories of loved ones are like songs in our soul.'
Margaret Wakeley —


Sunday, September 22, 2013

Tomato Cobbler

Happy First Day of Fall from my family to yours......the temperature has cooled, the rains have started - the gardens are being put to rest and the winter vegetables are being planted (at least here on the West Coast of British Columbia).   I have slowly beeb picking off my tomatoes both ripe and green, before the rain soaked them well.  I realized that this year's crop was once again very good to me! 
For dinner I made a Tomato Cobbler  as I have many ripe tomatoes, so very colourful and tasty.
This dish is very filling and just adding a nice green salad makes a perfect meal.  I added some vegetable protein that I had in the fridge but you can add any choice of protein you  or your family favours (bean would work nicely too).


Tomato Cobbler
 
The Ingredients you will need.
 
 
Add melted butter to your cast iron pan

 Mince the Jalapeno Peppers

Chop your tomatoes
 
Mix your dry ingredients together, adding the wet ingredients in
and pouring into the cast iron skillet on top of the melted  butter.
 
Top with the tomato/herb mixture - add some of your favorite cheese
and bake.


  TOMATO COBBLE RECIPE
 
2 1/2 cups chopped tomatoes
1/4 jalapeno diced
3 cloves garlic, minced
1/4 cup cilantro, chopped
1/4 tsp cumin
1/2 lime - juiced
1/2 cup shredded cheese (your choice)-
I had a few slices left over from earlier in the week and used them.
1 package vegetarian sausage, crumbled (I happened to have vegie breakfast patties)
salt, pepper
Mix above ingredients and set aside.
8 Tbsp( or less) butter, melted in a cast iron skillet
In medium bowl combine:
1/2 cup flour
1/2 cup cornmeal
2 tsp baking powder
1/4 tsp salt
1 cup milk (I use 1% but whole is good)
Combine all ingredients and pour into melted butter in cast iron skillet.
Top with tomato mixture
Bake at 350 for 30 minutes - uncovered
I would serve this with either sour cream or yogurt
You  can use Italian herbs for an Italian flavour using red pepper instead.


“When you begin to touch your heart or let your heart be touched, you begin to discover that it's bottomless, that it doesn't have any resolution, that this heart is huge, vast, and limitless. You begin to discover how much warmth and gentleness is there, as well as how much space.”
Pema Chodron (born 1936);
Buddist Nun


Tuesday, September 3, 2013

MUSHROOM FALAFELS


MUSHROOM FALAFELS
 
 
Crispy on the outside, tender and juicy - perfect filling for homemade Pita Pockets.
 
Ingredients you will need.

Herbs and garlic all minced and ready.

 Mushrooms sliced and sauteed.
 
Chop the mushrooms


 Panko crumbs are added to the herb mixture.
  
All ingredients are combined in a large bowl.

Here I test to see if adding an egg is needed.  I decide
that I like the texture when 1 egg is added.

Cooking the falafels in a bit of oil, browning and crisping them up.


MUSHROOM FALAFEL RECIPE
 
Ingredients
8 oz. mushrooms, sliced
1 tbsp olive oil
1/2 cup shallot or yellow onion, very finely diced 
3 cloves garlic, very finely minced
1/2 cup cilantro or flat-leafed parsley and 1/4 cup fresh mint, finely chopped 
1 tsp. ground cumin, optional - the cumin will give it a more falafel-y flavor
1/2 cup panko bread crumbs
salt
1/2 cup whole milk ricotta
1 egg, slightly beaten (optional)
 
Directions
In a large frying pan, add enough olive oil to lightly coat the pan. Heat to medium-high, add the mushrooms and cook, stirring occasionally until the moisture they release has evaporated, about 10-12 minutes.
    Transfer the mushrooms to a cutting board and let them cool for a while. When they are cool enough to handle, chop them well.  The shallot, garlic and herbs you can definitely chop up in a food processor.)
    In a large bowl mix together the mushrooms, chopped shallot/onion, garlic, herbs and panko breadcrumbs. Season to taste with salt. Then, stir in the ricotta cheese and egg if using.
    Line a baking sheet with parchment paper or a silicone pad. Use your hands to scoop up small handfuls of the mushroom mixture and press them into little patties about 1 1/2-2 inches across.   Transfer the patties to the lined baking sheet as you make them. Then, put them in the refrigerator for an hour.   This allows them to set and firm up so they don’t just fall to pieces when you cook them.
    When ready to cook the falafel's, preheat your oven to 350F. Heat a couple of Tbs. of olive oil in a large frying pan then add as many patties as you can fit into the pan. Cook for about 3 minutes per side, until nicely browned. As they are done frying, transfer the patties to another baking sheet (or the same one). Then, put the baking sheet of mushroom-falafels into the oven and bake for 5 minutes.
    Remove from the oven and serve warm. Put a couple of patties on a pita/flatbread add your favorite veggies and dollop generously with tzatziki or as my husband likes to eat them.....with homemade salsa.

    "Words are a pretext. It is the inner bond that draws one person to another, not words."
    Rumi

Whole Wheat Sourdough Tortillas

 Whole Wheat Sourdough Tortillas


2 cups (more or less) whole wheat flour.
3 Tablespoons melted butter.
Heat it just until melted. Don’t allow it to become too hot.
1 tsp. sea salt
1/2 cup sourdough starter. (Does not need to be at the peak of it’s activity.)
1/2 cup milk or whey (water works too, but milk/whey yields a softer end result)
 
In a medium bowl, mix together the sourdough starter, milk, salt, and melted butter.
Slowly add the flour. Depending on your flour and the moisture of your sourdough starter, you may need more or less than the two cups. Adding too much flour will result in a dry, crumbly tortilla. Not enough flour with yield a tortilla that is impossible to roll out. Find your happy medium. Use your hands to mix the dough so you can get a feel of where you are at.
Once your dough is slightly sticky, but no longer a wet mess, turn it out on a floured countertop and knead for 2-3 minutes. You don’t need to knead it as long as bread dough, you are just looking to develop enough elasticity to successfully roll it out later.
Allow to sour at room temperature for 8-10 hours or overnight.
Preheat a skillet to medium-high heat. Divide the dough into 6-8 pieces, depending on your size preferences. If the dough is hard to handle at this point, you can either coat your countertop and hands with oil or knead a little unbleached, white flour into the dough.
Roll into a thin circle and carefully transfer to the skillet.
Cook for 15-40 seconds on each side. You’ll know it’s ready to flip when bubbles appear and the edges of the tortillas look “firm”.
Transfer to a plastic bag for storage in the fridge or freezer.
These are best if eaten or frozen within a day or two. If you keep them around much longer than that, they really dry out. To reheat, place them in a warm skillet for 10-20 seconds on each side. Microwaving usually equals a rubbery tortilla, so I steer away from that.

Vinegrette 'Beet Salad' ...the way my Mother/Grandmother made it

Beets, such deep red colour and so good for  you......it's that time in the garden when the beets are full and plump, ready to be harvested and cooked into many delicious and nutritious meals.  They can be boiled, roasted or grated and eaten raw in a salad.  Blood builders 'as my Mother used to tell us' while we were growing - of course as children 'beets' were not the best vegetable in our minds, we used to take them from our plates and 'colour our lips', prolonging the moment before we actually had to chew and swallow.  As an adult I have come to love beets as have my young adult children.  
My Mother made a salad that is called   'VINEGRETTE'  phonetically translated from the Russian language in English I would call it 'Beet Salad' but it is more that just a salad, it is a full meal deal.  Beets combined with cooked Romano/Italian beans, celery, onion, carrots, sauerkraut and more, to spice it up we mixed in fresh homemade horseradish that my Father would make  with horseradish dug from his garden.  What a kick it would give to this sweet and tangy salad, dressed with some oil, salt and pepper (oh, and a little pickle/sauerkraut juice).  This is a great salad to take along on a picnic or for travelling when you need a healthy filling snack.

VINEGRETTE


The ingredients you will need.

 Everything diced, sliced and ready to be mixed,  oil,
salt and pepper added and of course the pickle/sauerkraut juice.
Horseradish is added in each individual bowl to taste.


So pretty, like jewels ready to be worn.
 All that is needed is a slice of homemade bread.
 
 
VINEGRETTE  'Beet Salad' Recipe
 
4 cups cooked beets, diced
1/4 cup onion, chopped fine
1/2 cup pickles, chopped fine
1/2 cup sauerkraut, chopped fine
1/2 cup (1 apple) diced
1/2 cup carrot, diced fine
1 can Romano/Italian beans ( or any bean you like)
salt, pepper to taste
 Olive oil (or your favorite oil)
Horseradish grated (optional)
 
 Prepare beets, cook until tender.  Remove skins and dice.
Combine the rest of the ingredients in a large bowl, dress with oil, salt and pepper.
 Serve chilled.    Horseradish can be added to each individual serving as per taste.
Enjoy!
 
"It is not a question of whether you "have what it takes," but of whether you take the gifts you have -- they are plenteous -- and share them with all the world."Neale Donald Walsch